


This guide is intended for Game Masters (GMs) that are already familiar with table top RPGs but are new to Realm of Strife. As such it does not contain instructions on how to GM in general concept but rather how to use your existing GM skills in conjuncture with the Realm of Strife rule set and game world to create and run an adventure/campaign for your players.
Contents
Creating Combat Encounters
As a GM it is extremely important to craft challenging encounters that engage your players. With so many enemies to choose from and such a wide array of player character strategies and abilities, no two encounters should ever really play out the same way. Be warned though, you will inevitably get at least one or more players that are expert theory crafters or min/maxers. They will scour through the rules and find ways to put together combinations of class mechanics, skills, enchants, and passives that will make them neigh undefeatable. A good GM must know the strengths and weaknesses of his players, AND EXPLOIT THEM AT ALL COSTS!!! Have that Knight that is practically immune to physical damage, throw casters at him. Have that warrior with 60+ crit chance, use enemies with damage reflection capabilities. Pesky rogue one shotting all your best monsters consider throwing heavy CC at them. In fact one of the best ways to deal with overpowered characters is just to turn them against their friends using one of many forms of mind control, then just sit back and laugh maniacally as they kill one another.
But despite your best efforts, and despite ours as the game designers, you will run into situations where a combination of skills or abilities is just so ridiculously overpowered that it has to be hit by the nerf bat. In all honesty with well over 1000 skills and abilities, all of which can interact or be modified when used in conjuncture with other skills and abilities, it is impossible to foresee every outcome. It never fails to surprise us just how creative players can get, and we love it. But that said, if you come across one of these OP combos please feel free to report it on our Balancing Issues page.
To get you started in creating encounters please feel free to use the following worksheet:
Threat Rating
Threat Rating provides GMs with a useful tool to assess the relative difficulty of an encounter. Encounter difficulty can be measured by using a rule of thumb that adds up the combined Threat Rating of all enemies involved and compares that to the sum total of the PCs levels (plus the Threat Rating of any pets, mounts, minions, etc…).
- If the value of the enemy group is considerably higher it will be a difficult encounter than may result in one or more player character injuries or death.
- If the value of the enemy group is approximately even to the player group it will generally be a challenging but well balanced encounter with a healthy amount of threat
- If the value of the enemy group is considerably less it will be an easy and relatively quick encounter
While this rule of thumb is generally accurate, it should not be assumed to apply across the board. Generally speaking a monster with Threat Rating equal to a characters level does pose a threat of serious injury or even death on a one-to-one basis. Therefore is using a single creature with very high threat to “evenly” oppose a party of 4 PCs, there is a high likelihood that if that creature can focus on a single player it will kill them rather quickly.
As an example consider a party of 4 level 2 PCs. There combined Threat Rating would be 8, and when looking to make a challenging boss-style fight a GM might choose a Black Wyrm (Threat Rating 8) thinking that this should be a well balanced threat. However a Black Wyrm could easily deal 30-40 damage in a single round and an average level 2 character might only have 30 HP. So while the party does stand a fair chance in defeating the Black Wyrm, 3 out of 4 PCs might die in the process.
It is therefore recommended that GMs use caution when matching a creatures Threat Rating to a party. A safer approach, while retaining a feeling of threat, would be to have no creature move than 2 Threat rating above the lowest level character in the party and instead add minions to bolster the overall Threat Rating of the enemy group.
A safer example would be to have a party of 4 level 2 PCs face off against an Orc Infantry Boss (Threat Rating 4) with 2 Orc Scrappers in tow (Threat Rating 2 each) for a total of 8, providing for an even threat matchup.
Also consider that not every encounter should be balanced. Variety can make Realm of Strife much more entertaining for your players. They may enjoy the feeling of being “overpowered” when they one-shot several lower threat enemies, only to then be reminded they are all too mortal when faced with a high threat target.
Factors to Consider
Here are some factors to consider when deciding on the relative difficulty f a combat encounter:
- Purpose of the Encounter
- Player Skill
- Relative Player Character Levels
- Group Size and Composition
- Enemy damage immunity or sensitivity
- Out Numbering (which can really throw threat calculations off…)
- How Badly do I Want to Kill Them All?
Purpose of the Encounter
First things first, you need to determine what the purpose of an encounter is. This often dictates how difficult the encounter should be. Perhaps you want to throw something simple at them just to get a feel for how they function together as a team. Maybe you want to learn their strengths and weaknesses so that you can adjust your strategies as a GM for future encounters. GMs have the difficult job of trying to out strategize multiple people, its 1 versus 3 or 4 or 5, hardly fair. Another consideration often is whether or not this is a henchmen fight or a boss fight. Henchmen battles can be a great way to whittle your players HP down some before the main event. This is always tricky though, because if you bring their HP too low the wise group of players will choose to rest up before proceeding. There is no hard and fast rule, but we find that varying the purpose of each encounter and thinking strategically about each encounter in succession makes for a more interesting and engaging play session.
Player Skill
This is kind of a no brainer, but we’ll say it anyways. Be aware of the skill level of your players, and we don’t mean in-game skills. How familiar are your players with tabletop RPGs, and even more specifically how familiar are they with the nuances of Realm of Strife. Not only is it terribly unfair to throw a group of brand new players up against enemies that require coordinated team play to defeat, it also runs the risk of really turn them of tabletop RPGs. Ease you new players into the game by providing them with encounters that slowly increase in difficulty, it’ll be more fun for everyone. On the flip side, if you know you are playing with a group of hardened veterans, don’t hold back. You’d be surprised what they can come up with in a pinch.
Relative Player Character Levels
The level of your players characters is extremely important when crafting encounters. Most enemies in the Codex of Creation state what level they are designed at, but its not always as simple as using only enemies that have the same level as your players characters. For instance you might want to use an enemy that is even as much as 10 levels higher than the player characters as a boss encounter, but this is sliding scale. At lower levels the rule of thumb is less accurate due to low level characters being extremely fragile. In our experience most player character deaths or serious injuries occur between level 1 and 3. As an example, a goblin with a two handed weapon is capable of one shotting some level 1 characters, while at level 15 a fury class might not even bother defending himself from the same goblin since the damage will help him generate fury.
Group Size and Composition
The size and composition of a group plays a huge part in the relative difficulty level of an encounter. We recommend that groups should be composed of between 3 to 5 player characters. Less than this can make encounters very one sided, and more than this simply drags encounters on too long. A well balanced group, ideally containing a Tank, a Damage Dealer, a Healer and a Support class, is quite capable of taking on most foes. They key word here being balanced. This means they can compensate for each others strengths and weaknesses, no matter what they face off against. However if they have no healer (and this is a big one), you may need to consider easing up on the damage a little. Likewise, if you have a group of cloth wearing squishies consider that facing them against hard hitting melee enemies could spell certain death.
Enemy Experience Balancing
Okay we’ll admit it. The experience values of enemies found in the Codex of Creation still need a lot more testing and balancing. Not every signal enemy worth 50 exp is exactly the same difficulty level. Balancing enemy exp values is a very tricky process that requires lots of testing and is very dependent upon the player characters facing them (i.e. a Mana Dragon renders most spirit users ineffective and therefore would be extremely challenging for a group of all spirit classes, yet it has the same exp value as a Fire Dragon). If you have any feedback regarding Enemy Exp Balancing please feel free to post on our Balancing Issues page.
Out Numbering
One circumstance we have observed where the experience balancing Rule of Thumb falls apart is when using hordes of lower level enemies against a group of higher level player characters. As an example 4 level10 PCs would be worth 160 exp. If you used the Rule of Thumb to balance them against a war-band of well armed Orc Infantry it would require 13-14 enemies. Unless the party has some significant area of effect damage and/or crowd control, these Orcs would easily overwhelm them. While fighting lower level enemies can be a lot of fun (especially for classes with area of effect abilities) consider exchanging 3-4 low level enemies for a high level commander to lead the horde. The experience balancing Rule of Thumb will become more accurate and you’ll open up a host of new strategy options, and a the same time you’ll make the groups tank feel important as he stands tow to toe with the big bad boss while the rest of them one shot the squishies.
How Badly Do I Want to Kill Them All?
As a GM it’s always good to ask yourself this question. There is a fine balance between making an encounter that is challenging and making an encounter that is unwinnable and results in the death and dismemberment of your entire group. If you’re not prepared to kill everyone in your group then consider having a back up plan the encounter proves too difficult. When player characters perish in combat it can have a domino effect. If the encounter was challenging with 4 of them, how much more so will it be when the tank dies, and then healer. There is no one answer to this question, as GMs come in all shapes and sizes. Some are ruthless and some are merciful, some wish to bathe in carnage and others are more concerned with ensuring the storyline advances. Ultimately, every GM must answer this question and then construct their encounters accordingly. If you’re truly sadistic, try lulling your group into a false sense of superiority by facing them against relatively weak encounters and then once they get over confident and sloppy, hit them with a deadly boss encounter, complete with several waves of add-on henchmen. Insert more maniacal laughter here…
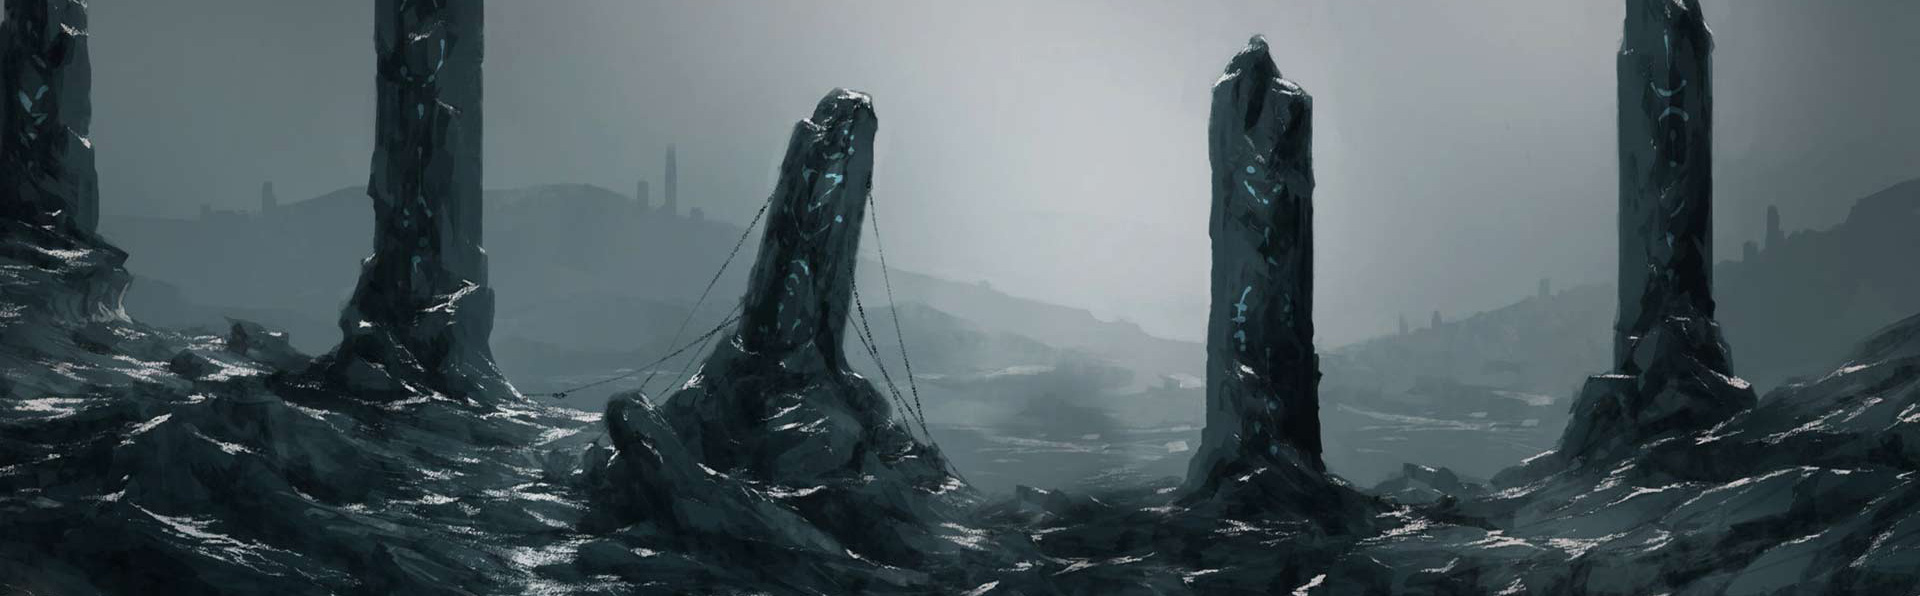
Constructing a Scene
The scene or battlefield for an encounter can play a huge part in not only making an encounter more engaging but also increasing the strategic element. As the GM its entirely up to what the size and complexity of the scene should be. We do recommend for a standard encounter to use a playing area of around 16-18″ by 16-18″. This keeps the action reasonably localized and prevents boring encounters where ranged characters pick the enemy off long before they ever get close. Of course sometimes this type of encounter can be very fitting for the situation so as always it comes down to GM discretion. Alternately if your engaged in a classic dungeon crawl style adventure, your scenes may be very small rooms or even hallways. There are two main components to constructing a scene:
Planning on Paper
Whether your actually using paper, or planning digitally, you are going to want to draw out a basic layout of what the scene or battlefield looks like, and where the enemies are located. It can be as simple as a hand sketch, a sketch scanned into a digital format and then marked up, a grid based spreadsheet representation, or a detailed design using computer software. There are many great tools out there to assist you in planning out encounters and scenes.
One free resource we enjoy using is the Dwarven Forge Map Maker program:
http://www.dwarvenforge.com/mapmaker/
With this free resource you can construct almost any layout you can think of. Once you’re happy with it you can save it for later or share it with friends using the custom web address. Another trick we like is to take a screenshot and load it onto your computer to add annotations and other markers. We’ve even seen GMs print off scaled versions of their layouts and use them as actual playing surfaces.
Setting Up Your Tabletop
Once you know what your scene looks like on paper, you’ll need to somehow replicate that on your tabletop. Once again there are a ton of different ways you can approach this. here is just a few ideas:
- If your paper planning is already quite elaborate why not just print it out as a battle mat. You could even consider laminating it so that you can mark it up as you play, then erase it and re use it later.
- Find high quality 3D terrain that fits the scene you’ve constructed. For a dungeon crawl we highly recommend Dwarven Forge products, they’re pretty much the best there is.
- Try using virtual tabletop software such as roll20.net or many other online resources. These work great if some or all of your players are not available to come sit around the same table.
- When all else fails, use your imagination. A really great GM can paint a picture of a battlefield with just words alone, so it’s not always that important if what is sitting on your table exactly matches how you planned it on paper.
Running an Encounter
Once an encounter begins the first thing you must do as a GM is establish the Turn Order.
Next resolve any thing that must be done before combat actual begins, such as Honor classes selected the oath or virtue that they wish to start the battle with. In some cases one or more participant in an encounter may have prior knowledge or special circumstances that need to be resolved, such as in an Ambush or if there are psychological Injuries that may prevent someone to participating fully.
Once any pre-combat conditions are meet, applied, or otherwise dealt with the character or enemy model(s) that is highest in the turn order goes first.
When it comes time for the first enemy model(s) to take there turn, you as a GM you are responsible for decided who, when, and how the enemy models will attack the player characters. While this means you technically can do whatever you’d like, GMs should consider following some type of basic form of enemy tactics. Players quickly become frustrated when there seems to be no rhyme or reason behind an enemy’s tactics. (I.e. if every battle the enemy charges straight for the fragile back rank healer before he or she has even started healing, your players may cry foul).
Basic Enemy Tactics
The typical tactical approach for GM controlled enemies is to target and/or attack characters that they see as posing the highest threat or that by targeting or attacking they can tip the possible outcome of the battle in their favor. But consider that as a GM you have privileged knowledge that the enemies you are controlling do not. Therefore, during the early stages of a combat most enemies will be unsure as to how best to do this so will naturally target the (visible) characters closest to them. If they do not have sufficient range, they will move towards them until they do. After the first or second round of combat the enemies will usually have a better idea of who the biggest threats are, and may adjust their tactics. Assuming there are no crowd controleffects that would dictate otherwise, enemies will typically follow this basic logic:
- IF no new threats are introduced, THEN Continue to target their original target
- IF a higher threat presents itself THEN switch to target the higher threat character
- IF it appears that they are having little success hitting their current target THEN target a more vulnerable character
The 1st condition is the most common and does not require an further justification
The 2nd condition may happen automatically, most commonly if another target hits the enemy for a substantial amount of damage (i.e. A Critical hit). That said, most enemies will give preference to remaining engaged in close combat if the alternative means charging after another target that they can’t reach or otherwise hit that turn (i.e. if a Troll is in base contact with a Warrior but just prior to its turn is Critically Hit by a Marksman 12″ away, the Troll would most likely just continue to attack the Warrior.)
This condition could also occur based on a successful Intellect test, representing the enemy using its brains to assess the situation and predict who is the biggest overall threat. This is a common approach for when a GM wishes to focus fragile back rank support or healer classes who are not directly causing damage and so therefore do not immediately appear to be an obvious threat.
The 3rd condition almost always requires a successful Wisdom test and represents a enemy learning the strengths and weaknesses of their opponents based on experience. A common example of this would be an enemy with a single high damage attack, facing off against a character with a Ward-off. If the enemy has very low initiative, they are unlikely to ever land an attack. After a turn or two of futilely trying to get past the ward-off the enemy should take a Wisdom test to see if they are smart enough to move on to easier prey. A similar situation would be a fire-based enemy caster facing a target with extremely high Elemental resistance. There are many instances where this condition could apply. In some it might be obvious that a target is immune and no Wisdom test would be required, so use your discretion. But in most cases your players will appreciate that you are being fair by using Wisdom tests.
In the end though, remember that you are the GM and if you believe there is a justifiable reason for an enemy to behave in a certain way don’t be afraid to insist upon it. Avoid getting into an arguing match with players that don’t agree, as it will ruin the experience for everyone else.
The Golden Rule of GMing
While running an encounter (or even while Role Playing between encounters) players should never ask “can I do X”, insist instead that they simply state “I am going to do X”, then as the GM tell them the consequence of that action.
Example1 (a player does it wrong and is corrected)
Player: Can I jump off my horse as I ride by and try to knock the bandit down?
GM: Don’t ask me what you can and cannot do, this is a Role Playing game, if you want to do something just say you are going to do it.
Player: Opps, sorry.
GM: No problem, why don’t you try that again.
Player: As I ride by on my horse I jump off and try to knock the bandit down.
GM: Sounds good, roll an Initiative test for the spontaneous dismount
Player: [rolls 1d20 against an Initiative Stat of 15 and scores a 6] I passed
GM: You come barreling into the town square on your horse and with all your momentum leap from the saddle like an armored cannon ball… now, roll an Agility test to see if you actually hit him.
Player: [rolls 1d20 against an Agility Stat of 10 and scores a 17] derp… I failed
GM: Sadly you miscalculate your trajectory and miss the bandit completely, crashing through the side of a nearby animal pen and landing in steaming pile of cow dung. Take 1d8 damage from the fall and when combat begins you will be at the bottom of the turn order for the 1st round and will count as being Knocked Down.
Player: Hmm… that didn’t work out like I thought it would…Example2 (a player does it right… well sort of…)
Player: I charge the castle wall and try to use my momentum to run up the side of it
GM: Okay, you charge at the castle wall but instead of running up and over it you smash into it and knock yourself unconscious.
Player: Wait! Don’t I at least get to roll something?
GM: No. You’re wearing plate armor, and its a 30 foot high stone wall…
Player: Well what the heck you said not to ask if I can or can’t do something, and that I should just say I’m doing it.
GM: Yes that’s true
Player: Well can’t I at least roll something.
GM: Okay fine, take an Agility test with an agility modifier that effectively reduces your agility to zero.
Player: [rolls 1d20 and scores a 10, but its reduced to zero and therefore it fails] I fail…
GM: Yes, yes you do.
Resolving a Combat Encounter
At the completion of a combat encounter or battle there a 5 main things that a GM must do:
- Deal with Surviving Enemies
- Award Experience
- Award Loot
- Deal with Injuries
- Apply Any Level-Ups
Deal with Surviving Enemies
Often times it can be assumed that any enemy that is reduced below zero HP can simply be permanently removed from the battlefield, however at times it may be appropriate for a GM to track enemy HP down pass zero (i.e. unconscious).
An example would be if an enemy is supposed to be captured alive. 10 HP or less is considered dead.
Regardless, if at the conclusion of a battle there are enemies remaining (conscious or otherwise), the GM must as ensure that his players deal with the situation. This could simply involve asking what they would like to do with the survivors but could also involve the enemies regaining consciousness to further harass the players or even just run off if the players neglect to deal with them.
Most honor classes will not kill an unconscious humanoid target. Doing so would result in losing 1Honor unless the player can come up with a very convincing justification.
Awarding Experience
The next step in resolving an encounter is to award experience (EXP) to the players any associated companions. The EXP gain for each combatant is calculated by taking the total EXP of all enemies killed or overcome (see “Creating Encounters” above) and dividing it up amongst the party based on the weighted contribution to the battle by each combatant, where a PC’s EXP value is determined by their Level prior to the encounter.
| PC Level | EXP Value |
| 1 | 6 |
| 2 | 12 |
| 3 | 20 |
| 4 | 30 |
| 5 | 42 |
| 6 | 56 |
| 7 | 72 |
| 8 | 90 |
| 9 | 110 |
| 10 | 132 |
| 11 | 156 |
| 12 | 182 |
| 13 | 210 |
| 14 | 240 |
| 15 | 272 |
| 16 | 306 |
| 17 | 342 |
| 18 | 380 |
| 19 | 420 |
| 20 | 462 |
When Mounts, Pets, Minions, or other types Non PC Companions contributed in some way to an encounter, their EXP msut also be factored in based on the EXP value as listed in the Codex of Creation. If they can gain levels assume their EXP value is +10% per level up beyond the original value). If they can level up they are also awarded EXP from the encounter.
Example: 2 PC’s (lvl 4 and lvl 5) with an attack dog companion (lvl 2) have combined XP value of (30 + 42 + 8 = 80) and kill a group of enemies worth 64 exp total
- the lvl 4 gets (30/80)=37.5% of the 64, equal to 24 exp
- the lvl 5 gets (42/80)=52.5% of the 64, equal to 34 exp
- the attack dog gets (8/80)=10% of the 64, equal to 6 exp
If all members of a party are not greater than level 3, count all player characters as equal for XP gains
It may be appropriate in certain circumstances to award bonus experience if players were particularly creative in their approach to an encounter or if special circumstances apply. (Examples could be when a player role plays some portion of the encounter exceptionally well or applies a brilliant strategy to assist in winning the battle in a manner not foreseen). Bonus exp can be handed out at any time at a GM’s discretion, however it should never exceed experience awarded by defeating enemies.
Award Loot
While GMs are free to use any loot system they desire. Some may wish to use a “realistic” approach where every piece of armor, equipment, and weapons carried by a creature can be looted once they are defeated. While it makes sense that anything carried by a defeated creature could be recovered, it can unnecessarily bog down a play session if players must sort through several dozen looted items after each battle. A simply work around for this is to assume that most of a creatures armor or weapons’ are NOT recoverable due to being irreparably damaged from the previous combat.
The standard approach for loot in Realm of Strife (when using pre-built enemies from the Codex of Creation) is to first award any loot specified in the “DROPS” field of CoC entry of any and all defeated enemies. Next, roll 1D12 (for regular enemies) or 2D12 (for boss or boss-like enemies). Consult the table below to determine what loot drops. For armor drops (results 1-8) the type of armor is dependent on the type of armor the creature wears and only results in an armor drop if that creature is wearing an equivalent amount of slots.
For example, if a Orc Scrapper is slain its CoC entry lists its Armor as “Mail, Plated x5” meaning it is wearing 5 slots worth of Plated Mail. A roll of 6 would result in no armor drops as the Orc does not have that much armor on. However a roll of 4 would result in the equivalent Foot Slot Plated Mail (Platemail Greaves) dropping. A roll of 10 would result in the Orcs main hand weapon (a Warbrand) being dropped.
| d12 | Loot |
| 1 | Leg Slot |
| 2 | Chest Slot |
| 3 | Shoulder Slot |
| 4 | Feet Slot |
| 5 | Hands Slot |
| 6 | Arm Slot |
| 7 | Back Slot |
| 8 | Head Slot |
| 9 | No Loot |
| 10 | Main Hand Weapon |
| 11 | Off Hand Weapon |
| 12 | Alternate Weapon, Trinket, or Other Items |
It is important to note the relative size of the enemy that dropped the loot as over-sized or under-sized armor may not be immediately equipable.
Note: Looting in combat is possible, but can only be done while in base contact with a fallen enemy and requires an instant to loot items found under “Drops” and an action to loot armor or weapons found in equipment slots.
Dealing with Injuries
If any player character (or their associated companions) were reduced below zero HP at any point during the encounter see the Injuries page and apply any effects immediately.
Apply Any Level-Ups
If any player characters (or their associated companions) leveled up as a result of the encounter see the appropriate Class Codex to immediately apply the level up (and any associated Title ups as well) before continuing on.